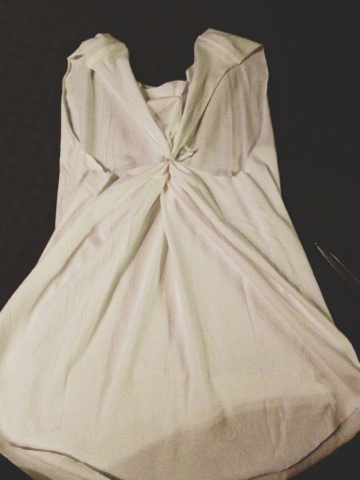
This is the back of the tee...
This is a fun DIY! Right now I am into cute workout wear!
My theory is: if you have really cute workout gear 1. You'll want to work out. 2. You'll feel cute working out! It's a bonus to actually get toned while looking cute! 😉
Also, if you don't want to work out in this, but you do want to show it off, just wear it as a tank top! Who'll know, right?!
This is a 2 part DIY. But can I just say, its totally worth it and easy peasy to make!
What you'll need:
Men's t-shirt ( I used an XL tall from oldnavy.com, I like the length.)
Scissors
Step one: lay your shirt out.
Step two: fold your shirt in half. And smooth out as many wrinkles as possible.
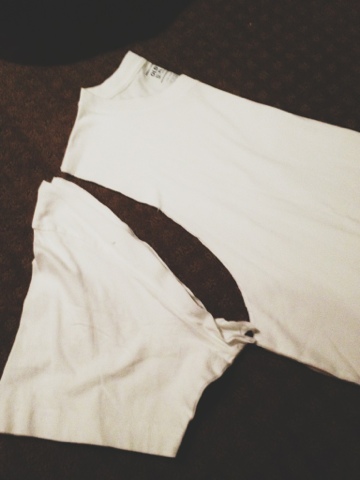
Step three: use your scissors to cut the hem of the shirt to a baseball hem. (rounded hem) just eyeball it.
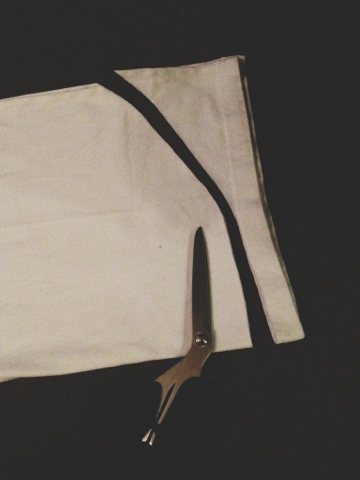
Step four: cut the sleeves off, a rounded angle.
Step five: Cut neckline an inch to two inches below the actual neckline. Keep up with the curve of the neckline.
Step six: lay out the shirt.
Step Seven: Take half an inch of left over fabric (I got it from the sleeve area) and cut it to make a strip.
Step eight: gather the back, armhole to armhole together, bunch all the fabric together and hold.
Step nine: use the 1/2in. piece of fabric, tie it around the bunch. Then wrap it around the bunch a few times. And tie it off. Then cut use your scissors to cut the ends off.
And then you are done with this part! Next week second part! Whoop whoop!
Thanks for reading y'all! -Ryn